Now you’re thinking, “Great, here are these editing programs, but how the heck do I use them?”
I always think that the best way to learn something is by trial and error. Chose an image and play around with it until you figure out what everything can do. It is nice to know a little bit about what some of the tools are meant for, however, so I will try and guide you through a few of the tools that I think are the most beneficial and useful for my editing purposes.
Copy your image:
The very first thing to do when you open an image is to make a copy of it. How sad would it be to make all these cool changes, then make a mistake, and lose the image completely? It’s always better to start from the beginning than it is to start from scratch. Besides, it’s cool to look at the before and after images. To make a copy, in the bottom right hand corner there will be an area with all your layers. Right click on your image and chose the option to ‘duplicate layer’. This should then leave you with two layers in your layers box.

Healing Brush:
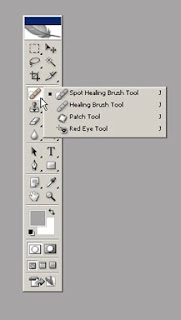
First of all, when I think of Photoshop, I think of getting rid of nasty blemishes and zits I might have had on family picture day! How might I get rid of them, you might wonder, there are two ways to work through this problem. The first way that I would choose is the Healing Brush. It will be on the right hand side with an icon that looks like a Band-Aid. Once you have clicked on it, find an area on the image that closely matches the area you want to cover up (probably right next to the blemish), then you’ll hold down the option or control key and click. Move your mouse over the blemish and click, wiggling your mouse a bit to fully cover the area. When you let go, the image will make an adjustment using the area you wanted to match the area you covered. You might have to repeat the steps a few times until you get the desired results.

Clone Stamp:
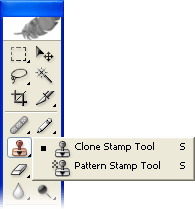
Another way to cover blemishes is to use the Clone Stamp tool. This tool looks like a red and yellow stamp. Similar to the Healing Brush, you’ll choose an area that looks closest to where you want to cover it up. Again, push the option key over your good area, then color over the blemish. This time you can watch where your mouse is covering and it is making an exact copy (or clone) of the area you chose to cover it up with. Experiment with it and try it out!

Burn and Dodge Tools:
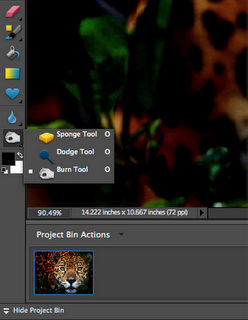
A couple more tools that I really like using are the Burn and Dodge tools. These are located under the same icon. You have to click and hold to get all the options, but usually it is automatically on the Burn tool that looks like a grey fist. This tool darkens your image. I use this for making the background darker, thus causing the foreground image stand out a little more. Opposite of that is the Dodge tool. This tool makes the image lighter and can be used to highlight areas, or bring out the entire foreground. Sometimes it is cool to use the burn tool and the dodge tool, but be careful of making too big of a contrast.

These are my favorite tools in Photoshop. Like I said before, play around with it and see what you can do!!
Very detailed and good descriptions of the various tools.It could have used some pictures but that is about the only flaw I found. I love that you also suggested some other programs to use that are cheaper. Good job!
ReplyDeleteFabulous post. Really informative and descriptive. It was really easy to follow and I like how you made it personal and wrote as if you just knew how your readers were feeling. Great job!
ReplyDeleteWhat I really enjoyed about your post was that it was very teacher friendly, it was directly to them. I also liked that you included that you can use this for pictures in your classroom for the visual learners, it's always great to know WHY we are learning something. You had great descriptions and I like that you emphasized to just try it out and play around to see what you can do.
ReplyDelete